如何载Ubuntu下搭建Hexo博客
安装Git
sudo apt-get install git
安装NodeJs
wget -qO- https://raw.github.com/creationix/nvm/master/install.sh | sh
安装完成后,重启终端
nvm install stable安装Hexo
npm install -g hexo-cli
npm install hexo –save初始化Hexo
hexo init
安装Hexo插件
npm install hexo-generator-index –save
npm install hexo-generator-archive –save
npm install hexo-generator-category –save
npm install hexo-generator-tag –save
npm install hexo-server –save
npm install hexo-deployer-git –save
npm install hexo-deployer-heroku –save
npm install hexo-deployer-rsync –save
npm install hexo-deployer-openshift –save
npm install hexo-renderer-marked@0.2 –save
npm install hexo-renderer-stylus@0.2 –save
npm install hexo-generator-feed@1 –save
npm install hexo-generator-sitemap@1 –save
//安装 ejs,否则无法解析模板
npm install安装Hexo部署工具
npm install hexo-deployer-git –save
生成Hexo静态文件
hexo g
开启Hexo本地服务,验证是否搭建成功
hexo s -p 80
意思是在本地80端口开启hexo服务
浏览器访问localhost验证提交到github
- 创建一个名为:yourname.github.io的分支
- 修改_config.yml文件,配置deploy的type类型为git,resp为你的分支访问方式(有两种,一种是ssh,使用密钥链接,适用于维护单个博客,方便使用;一种是https,提交需要输入您的github账户和密码,适用于维护多个博客)
- hexo d提交到github
github提交的两种方式
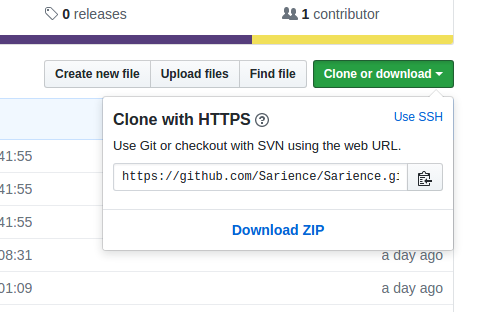
- https
提交类型为https,repo填你的repository地址,如图: 123deploy:type: gitrepo: https://github.com/Sarience/Sarience.github.io.git
在提交的过程中,会需要你输入你的github账号和密码,账号密码正确后则提交成功
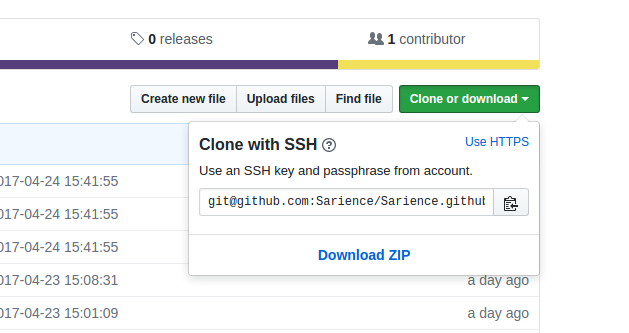
- ssh
提交类型为git,repo填你的repository地址,如图: 123deploy:type: gitrepo: git.com:Sarience/Sarience.github.io.git
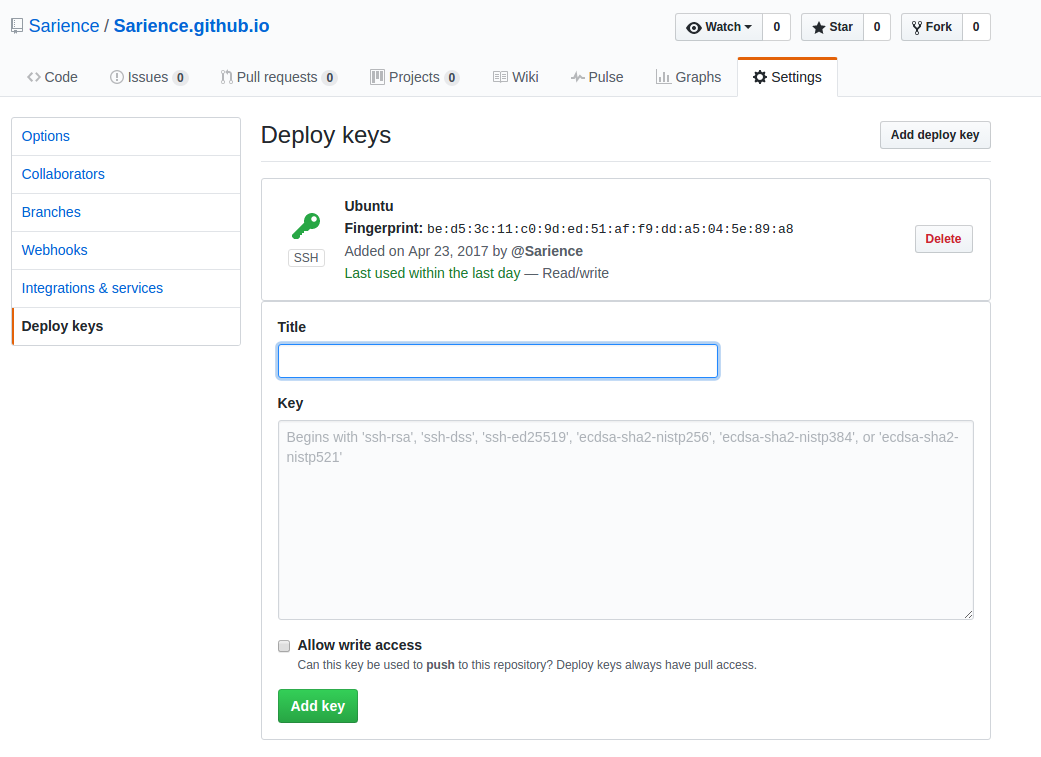
在执行hexo d之前,先要生成rsa秘钥并且将你的秘钥添加到repository的设置中:
1. 执行`ssh-keygen -t rsa`,会在你的home目录下生成一个`.ssh`文件夹,其中会有两个秘钥,一个公钥,一个私钥
2. 执行`cat ~/.ssh/id_rsa.pub`
3. 将其内容复制并添加到repository中
记得勾选Allow write access
4. 执行`ssh -T git@github.com`进行测试,看到`Hi [yourGithubAccount]! You've successfully authenticated, but GitHub does not provide shell access.`说明秘钥添加成功
5. 设置用户信息:
`git config --global user.name "[yourName]"//用户名`
`git config --global user.email  "[yourEmail]"//填写自己的邮箱`